Friends are always asking me how I keep my camera and long lens steady when shooting from open land rovers and jeeps. As my friends and family know, a simple answer just isn't in my DNA. And since I can't handhold super-telephoto lenses as a petite barely over 5' female, my response typically goes like this:
Cameras, Lenses, and Support
- I tweak my packing tactics depending on airline rules/hassles, the shooting terrain, type of vehicles, ability to drive off road, distance to subjects and the amount of walking.
- Airlines are getting unbearably strict with carry-on weight and trying to figure out what not to bring is the most stressful aspect of safari packing. As a result, I always define priorities before selecting what gear to bring because there are always trade-offs - i.e., focus on getting the home runs or the bucket list and/or start capturing a wider array of creative shots/video, etc. If priorities are rock solid, then missed shots from not having longer or shorter focal lengths are less important in the overall scheme of things; and, I limit myself to 2 lenses, 3 max, due to weight restrictions. It also means having to leave behind a lot of stuff - i.e., fill flash, remote cables and monopods, etc. - and only booking trips that meet my goals and where airlines/flights don't hassle customers with carry on weight.
- Important: when someone recommends a certain lens kit and/or camera settings, be sure to check their photo gallery to see if those are the types of images that you want to capture to avoid mixing apples and oranges. In my case, priority subjects are mamas with cubs - cheetahs, leopards, lions, pumas and bears - which means that I need to provide a comfortable distance for them; and, more often than not, I need to wait days until a mom gets comfy with my presence closer in while using 500-700mm. Getting that trust is always the focus/highlight of a trip because I like to capture facial expressions and behavior aka I shoot tighter than most. Sure, I would love to get those creative animal-scapes that everyone is doing nowadays; but, it takes time away from my effort to find/spend time with a given family. Plus, I can't carry any more gear, don't feel comfortable changing lenses in the field, and know my physical limits. That's why I'm always cautious when recommending what to buy or pack. I'm me and you're you. Also bear in mind that developing a unique, memorable portfolio takes focus and a long term commitment. It does not happen overnight and differentiating from others is not easy; especially, when fields guides have the same gear and many more days in the bush.
- Anyway, I've used the EF 500mm/4 (I/II) with/without an 1.4x extender since my first safari back in 2004. For my petite size, it's easier to transport than the 400/2.8 or 600/4, not to mention the 800/5.6 that I use to deal with. My cameras have always been Canon pro bodies and it's now the R1/R3 paired with Delkin Black 4.0/2.0 and ProGrade 2.0 Cobalt CF Express cards. I tried to save weight with the R5 but it just wasn't for me (no Smart Controller or separate Tracking on/off capabilities and more batteries/chargers to deal with). Every ounce counts and I even shaved weight from the 500mm II by using a Zemlin short hood and Wimberley low profile foot. For air travel, I use neoprene covers/travel coats, in lieu of camera bag dividers, and remove camera straps. My 2nd lens is the RF 100-300/2.8 w/extenders (or the RF 100-500/RF 70-200 in a weight pinch). For wider, I resort to my iPhone 16 Pro Max. My Thinktank Advantage XL weighs in at 32 lbs. and I don't do trips involving smaller planes with stressful weight limits. Here's my packed bag circa Feb. 2025 before adding the Lenscoat TravelCoats (optional). Note: placing the Wimberley feet face up adds some bracing (sans dividers), the stuffed zipper pocket (w/cords and cards) molds against the extenders, the pencil case holds 4 Samsung SSDs and the black round case holds spare eyeglasses. Note: because of new 3D scanners, TSA is starting to scrutinize SSDs. This happened to me at SFO and the reason was that the drives look like batteries (on that trip, they weren't in a camera bag). The agent that stopped me wasn't tech savvy, so moving forward, I'll pack paper documentation.
- For walking trips, like Patagonia where lugging a 500mm rig plus monopod was too much for me, I use the RF 100-300/2.8 with 1.4x/2x extenders as my primary len; and, pack the RF100-500 as backup. Note: I had originally intended to make the RF100-300 my primary lens for Africa as well; but, it's been hard to give up the 500mm lens which has delivered so many treasured images over the years.
- IMHO, super-tele primes - i.e. 300/2.8 - 800/5.6 have always given the best image quality in terms of bokeh, tonality and pop aka it's not just about being sharp. But as airline carry on rules got more restrictive, I've embraced zooms albeit reluctantly.
- My travel bags are the ThinkTank Airport Advantage XL roller @ 7.4 lb. and the Arcteryx Mantis 26L backpack @1 lb. 14 oz. Before that was GuraGear's Bataflae 26L/Kiboko 30L during my younger pack mule days. When using the RF 100-300/2.8 as my main lens, I can squeeze into the lighter ThinkTank Airport Advantage roller albeit with caution because of the shallower depth. It also means that I have to use my lowest profile lens foot (Wimberley or 4th Gen) vs the comfy ProMediaGear or RRS w/QD.
- In Tanzania, I drive to/from camp from the Kilimanjaro Airport even though it kills an entire day. But, this avoids the stress of bush plane weight constraints.
- In Botswana/South Africa, I book an extra bush plane seat because of strict weight and safety limits. This enables me to carry gear inside the cabin and mitigates the risk of my checked bags getting bumped onto a later flight. This did happen and when it does, it could take days/weeks for luggage to catch up.
- When shooting from a window, my "no brainer" camera support is the Naturescape's Skimmer Ground Pod II with a RRS Monopod Head MH-01 seated on top of Naturescape's SkimmerSack II molar beanbag. I like the tilt function of mono heads because I can fine-tune my lens angle while keeping my camera/beanbag flat and balanced. When I need more height for reducing neck/shoulder strain, I stack a flat beanbag on top, a Skimmer riser or a Promediagear Tomahawk GT2. I prefer Land Rovers because they're less apt to get stuck in the mud and have easy to adjust row down windows; but, currently, my Tanzania driver uses a LandCruiser with modified (wide) roll down windows.
- I also pack a half dozen beanbags - Lg/Sm Kinesis Safarisacks and an ancient smaller WildlifeImaging molar bag (to be replaced with the SkimmerSack Mini) - which I use to cushion cameras from banging against each other, the doors when driving around on bumpy ground, for bracing gear against seats to avoid excess vibration, as a knee cushion, and as a floor cushion in case the 2nd rig falls off the seat due to unexpected potholes (3x in 24 safaris, so lesson learned). Note: I'm always in a private vehicle by myself or maybe 1 other. I pack beanbags empty and then fill them with seed, rice or beans which I purchase locally upon arrival; i.e., in Karatu near the Crater in Tanzania. This valuable staple is always returned to the camp or gifted at the end of my visit. Also beans can stress the SkimmerSack's seams and I reinforce them with Tenacious Tape.
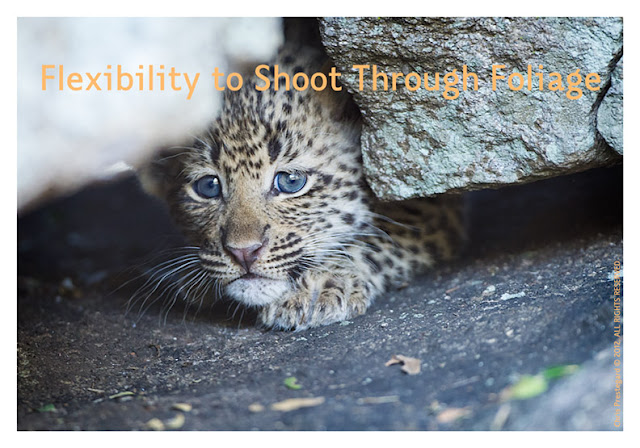
- In open vehicles with slippery roll bars - i.e., Botswana/South Africa - my "get it sharp” method is to use a collapsed monopod. The monopod foot is positioned on my seat between my legs, my camera is leaned against the molar beanbag, and I press one knee into the front seat with one foot planted in front of the other. I also drape an elbow over the roll bar or against it. As needed, I do the same in reverse using the back seat as the anchor point. This beanbag-monopod system gives me the most speed and flexibility for shifting side: side, forward:back and pointing upwards for subjects in trees or rocks. And I can sit/wait/watch as long as needed with my body relaxed. Before the vehicle stops, I'm already in position to get the cleanest shot shooting through thick foliage, i.e., when photographing tiny 5 week old leopard cubs peeking out of their den. Being able to adjust my camera position freely helps to wrap the light more effectively as well. And if obstacles or someone is blocking my view, I can lean back and work with the monopod from the floor. To keep it steady, I wrap my left foot around the lower leg and the mid-section is pressed against my outer thigh/inside calf.
- My safari monopod is the compact/travel friendly Gitzo GM5561T along with a Gitzo G1220.130 Big Foot All Terrain Shoe enforced with blue Loctite/egrips. My monohead is the .9 lb. Really Right Stuff. Monopod Head w/Lever Clamp (MH01) and I used a 12 oz. RRS TA-2U Universal leveling base when weight wasn't an issue. For walking trips like Patagonia, I switch to a Promediagear Tilthead HM1 (lighter/much better tension resistance) attached to their 1.2 lb. TR34M monopod (lighter as well). Unfortunately, the Tilthead isn't compatible with my beloved Skimmer Ground Pod II mentioned above.
- Beanbag + Monopod 101: It's important to lock down solid - monopod, face, elbows, knees and feet; and, to relax the upper body. I always keep a hand on my gear to avoid long lenses from bopping someone's head, or whizzing out the window. When changing batteries, cards or extender - or talking/snacking - I keep a camera strap or Optech connector wrapped around my wrist for good measure. These Optech Uni Adapter connectors , which I use to attach lenses to cameras, give me peace of mind. My primary camera straps are lightweight UP straps and I sometimes use BlackRapid straps modified w/Promediagear QD connectors. I also secure lens feet/plates to camera straps as well with Foto&Tech tethers aka on walking trips.
- Before the vehicle stops at the next shooting location, I have my monopod set up at the right length and the beanbag in position on the roll bar. Tip: It's also important to communicate with the ranger/driver so that he knows where you want to be positioned and at what angle for the best background and lighting - for every subject that you approach. When folding up and collapsing your rig, be careful not to pinch your fingers or knuckles unless you want a major ouch.
- When shooting, my left hand is pressed against the monohead and not on top of the lens barrel which reduces stress on the lens and camera mounts. If not, lens mount screws can crack (been there) and one wouldn't know it until the camera starts having errors.
- Noise and fast motion are your worse enemies, especially if you want to relax subjects; such as, young cubs, birds or skittish elephant and impala. Remove all jackets, dry sacks and rain covers before reaching subjects (i.e. 50 - 100 yards away) as noise from fabrics can disturb animals, especially non-relaxed cats and very young cubs. Also, finish unzipping/zipping up bags as well and refrain from sliding around on the vinyl seats. Note: Wax your bag/jacket zippers before trips for smoother/faster operation. If you can turn off the shutter sound on your camera body, do that as well. Note: on walking trips like for pumas in Patagonia, it's important to replace noisy Goretex pants with less noisy fabrics like Arcteryx shells when approaching moms with cubs.
- Important: Talking should be minimized, so use hand signals with your driver/ranger for clarity and speed. It always amazes me how much people talk in the bush given that sound carries such a great distance, even to the human ear. Cats are notorious for going off road and hiding in the bush until noisy vehicles pass on by. Also, find your own subjects to avoid being in the presence of other vehicles filled with noisy passengers; i.e., moms and babies will be more relaxed when you're alone. I also believe that cats evade negative vibes as well, so be positive and leave restless talkative buddies at home.
- To keep my 2nd rig stable on vehicle seats, I attach Wimberley M-1's to the lens plate. They also prevent neoprene covers from getting caught on beanbags when panning.
- For "shooting directly off the floor" - i.e. from open vehicles in Botswana/South Africa - the SkimmerSack beanbag works great as a lens/elbow rest and a kneelon comforts the knee. For leopard safaris where subjects are often sitting in trees, I liked using the 4th Generation Designs Monopod Companion with Clamp Post (super light, reduced neck strain, only 15 oz. and packed in a small ziplock baggie) but have since downsized my travel kit.
- To assess potential shots while keeping a firm hand on expensive rigs, I use a lightweight monocular - the Leica 8 x 20 Monovid @ 4 oz. with Ultravid glass or .56 lb. Leica 8x20 Trinovid binoculars. Worse case, I pack a Zeiss 8x20 T @ only 2.7 oz.
- Tripod Air Travel Mantra: pack the lightest legs appropriate for the longest lens, discounted by the amount of anticipated usage and the amount/difficulty of walking; i.e., I switch between Gitzo 2, 3 and 5 legs (for non-Africa trips such as pumas/bears). When shooting with the 800mm/1.4x III - i.e., in windy Hudson Bay - I use a GT5541 + Wimberley WH-200 combo. For the 500mm II, I use a GT3540 (w/Markins TH-300 hub to save .4 lb) + FlexShooter Pro ballhead/lever and will sometimes use the lighter GT2540 in a pinch. Note: for safety precautions, I connect lenses to cameras using Op/TECH Uni Adapter Loops. Regarding IS settings, I normally use IS II or III.
Positioning the Vehicle, Be Ready to Shoot in < 5 Seconds
- The faster you can stop, the quicker you can shoot. If your driver needs to back up, fiddle with positioning the vehicle or hesitates in turning off the motor, your subjects have either skittered away or relaxed their curious body posture - and, you've just lost direct, wide open eye contact.
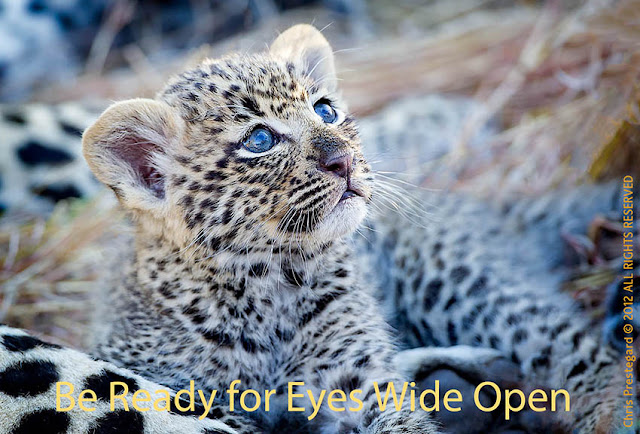
- And, if you're not ready to rock and roll, you just missed the shot as well. A minute before the vehicle stops, remove noisy dry bags and have your monopod/bean bags adjusted to the right height and position. Temporarily cover/protect your camera/lens from dust with a throw over instead. Also, re-check/decide on your metering. Be prepared to shoot in 5 seconds or less without swinging your big lens up in a way that startles subjects. Also have your short lens ready for action. A male leopard fight lasts 25 seconds or less. If the driver is fiddling to move you to the perfect position, you just lost some great shots. So, agree on the best case car position/nose direction in advance - even if you could get closer - and, commit so that you can start shooting ASAP with the motor turned off. It goes without saying that you need to pick your roommates wisely and that you are on the same page in terms of priorities and readiness. Note: looking back, I've concluded that my best baby shoots were when I was the only shooter in the vehicle.
- There's never a perfect position when subjects are moving among shrubs or playing erratically, so think strategically and look for clear openings up ahead. Then, have your driver get 30 - 50 yards ahead in order to photograph subjects coming towards you. If not, you'll only have seconds to shoot before it's time to move the vehicle again (bad for you and stressful for subjects). Also have a mental plan on how you're going to shoot in multiple directions without having to move the vehicle; i.e., move your body and/or have beanbags set up on both sides of the vehicle.
- If subjects are nestled inside shrubs/bushes, look for potential clear openings before the driver stops the vehicle which saves precious shooting time. A bit of grass in the way? Just shoot and use it for framing. Then, try other positions after you're gotten some worse case shots; i.e., it's better to crop than not get the shot at all.
- Preferably, I like to shoot to the left through a window and if rollbars, then I like the vehicle angled 20 degrees at the10P position since I'm an left eye dominant shooter.
- With skittish subjects - like mothers with babies and zebras - I always start further away and slowly move closer as appropriate.
- With shy subjects - like near distance birds and certain antelope (kudu, nyala, klipspringer and steemboks) - I ask for the vehicle to be stopped immediately and angled 20 degrees to the left or right (since there's no time to fiddle with re-positioning the vehicle or turning it around).
- Scouts/drivers can't read your mind or predict your real-time shooting objective. So, communicate clearly and politely before you reach your subject/s. Hand signals - i.e., cut the motor - are more effective when there's a noisy motor or loud wind. Be a teammate - aka don't act like a boss - as genuine respect goes a long way. In addition, drivers respond much faster when you learn key phrases in their local language.
- It's not a shot unless it's sharp. And, it's not sharp unless you can print it large. So, if it takes longer than you'd like to get set up and locked down solid, stick with the basic beanbag (the easiest) and practice with the more complex monopod combo when appropriate; i.e., while waiting around for sleeping lions to liven up. Know that you'll get more efficient the more you practice. You don't want to be fiddling around when others are ready and trying to shoot; or, risk missing that critical magic moment.
- Work just as hard in spotting subjects as you have a broader and higher 300 degree line of sight; whereas, scouts/drivers are concentrating on avoiding elephant/anteater pot holes, hidden rocks/logs and thorny trees branches in addition to driving smoothly on bumpy roads while trying to spot for subjects.
- Take turns with your buddy on scouting to the right or to the left to increase overall results. Develop a rhythm for checking near:far and high:low. Don't get complacent and try to be the first vehicle at a sighting. Train your eyes to spot subjects in trees and behind bushes as you whiz on down the road (aka easy for drivers to miss).
Key to Success
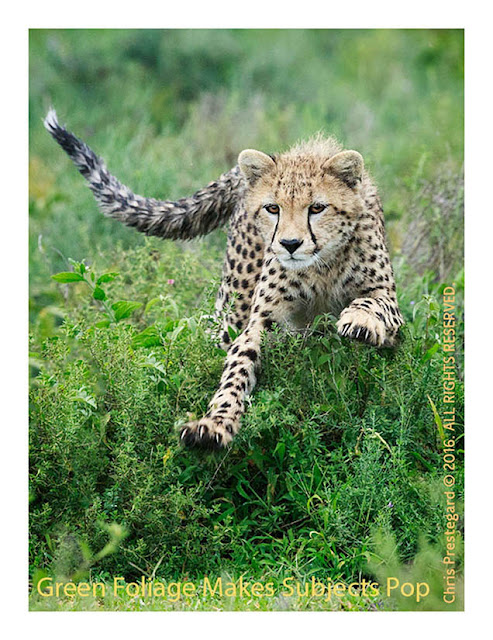
- Commit to specific priorities and book the camps or lodges that have the highest probability of success; and most importantly, at the right time of the year. Personally, I like green grass in my background with foliage short and lush rather than long and dry. As it is difficult to predict the perfect timing for a trip (after some rain but before the heaviest rainfall when it becomes too muddy to drive and/or when the icky spiders come out), I'm happy if a trip yields at least 2 stellar days out of the total days booked.
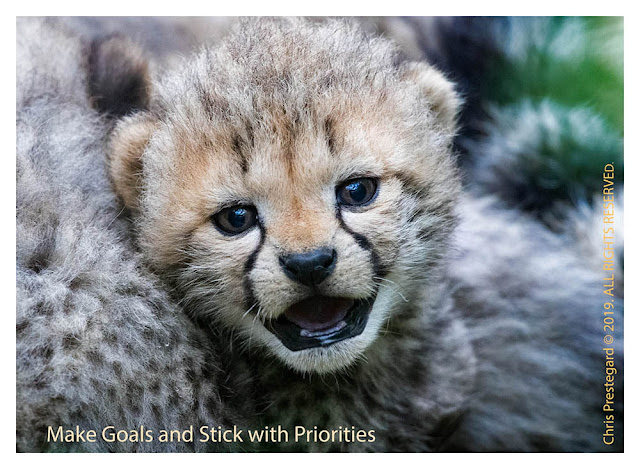
- Since I have very specific goals - i.e., cat and bear cubs - I like to stay 11 - 14 shooting days in one location in order to learn the lay of the land, the behavior/personality of targeted subjects, to give subjects a chance to relax in our presence, and to factor in weather constraints. Typically, I concentrate on one country/subject/locale at a time for several consecutive years. This helps to hone tracking knowledge and individual/group behavior traits. Also, I only visit places where we can drive off road, even if it means bumpier rides or smaller concessions. If you want young subjects, it's important to learn if the mother is relaxed with vehicles or not. The mother of this cub was very skittish but we got lucky because she got use to our scent, sound and vehicle after a week of visiting. It was a lot of hours of sitting around, but worth it for me.
- If you have the ideal subject/s but no activity or eye contact, force yourself not to drive away, especially if you're blessed with good lighting. A bird in the hand is worth its weight in gold. Instead, wait and pray for distractions behind your vehicle - i.e., elephants, baboons, giraffes and impala - for more awesome photo ops. Without these distractions, aka props, you'll end up with more run of the mill images.
- It's important to remain totally quiet so that subjects become totally relaxed, can comfortably communicate with each other, and can listen easily for their prey or predators.
- If it's necessary to drive away from a primo sighting or potential cub den, return several times a day and sit quietly for a while so that subjects can get use to your scent and voice. The younger the family, the longer the time investment before you are rewarded with a relaxed mama and decent sightings of her cubs; i.e., 8 - 10 days isn't unusual. Because my voice is naturally soft, I like to talk soothingly to moms with teats (even when they're hidden or before we've found the den) so that they know that my driver and I are not threats.
- Keep a safe distance, use a long telephoto lens (i.e. I normally shoot @ 700mm plus) and watch for telltale signs of stress. If mama's eyes are half closed when turning your way - i.e., similar to a very mellow domestic cat - then its normally fine. If another vehicle or more drives up and corners her exit path, then it's best for everyone to pull back as cats - especially my very spoiled feral cat - do not like feeling boxed in.
- If there are other cars around prior to your arrival, drive away until everyone is gone. Mamas seem to be more relaxed with only one vehicle around along with familiar scents and positive vibes.
- If subjects are hungry - aka listening/smelling for prey and waiting patiently - never/ever block their line of sight and smell. Ditto if there are predators around.
- Never spook subjects by getting too close or driving too fast - especially if they're hunting - because it could result in the lost of a meal - and, every catch is extremely important.
- Give your subjects time to rest and allow them some privacy on a regular basis.
- Be prepared to wait as long as it takes - i.e., hours and days - to capture unique images.
- Lastly, don't forget to look up as well as behind you. For instance, this leopard cub was up in a tree behind us - for hours - before I finally noticed it after driving around. That because we were all focused on the mom trapped up another tree by a female lioness and a nearby male. The coolest thing was that this cub never made a peep, even though it had to be hungry.
Camera Settings - Canon R1/R3/R5
- I try to keep things simple and always review manuals/AF Setting Guidebooks at the start of each year as a refresher.
- My default settings are: Raw, Electronic shutter, AV, Daylight WB, evaluative metering, Servo 1st Image Priority-Equal (for mammals), One Shot Focus Priority, Single-Point AF, High fps, EV +2/3, Animals, Eye Detection on and Full frame tracking off. In addition, Viewfinder auto LCD is off, exposure simulation is on, display performance is smooth, and Continuous/Preview AF is disabled.
- For stationary, low contrast/spotty/dark subjects or if there are distractions in front, I pump the * button set to One Shot because focus lock is instantaneous (green box in focus indicator). And, if working with a very shallow depth of field on the 500mm II w/1.4x, the camera doesn't fight me when I need to focus slightly forward aka on the bridge of a leopard's nose.
- For moving subjects, I use the AF-On button to start AF (blue box indicator) after I've selected my own initial focus point with the Smart Controller (R1/R3). Servo Tracking Sensitivity is set to +1 and autofocus starts with a half press on the R1 and full press on the R3/R5. The magic of the R1 is that I can then activate whole frame AF Subject Tracking by pressing the AF-On all the way down; whereas, I need to press the MFn1 button on the R3 to turn Subject tracking on/off (double white line indicator). For me, this eliminates focus hunting distractions (bouncing blue boxes), is faster/more accurate, and only starts when the subject start moving. I truly wish that that the R5 had this Tracking On/Off capability, not to mention a Smart Controller, which is why I didn't consider the R5II. Note: I haven't gotten into Custom modes or using the 3rd custom button yet because I'm afraid that I'll screw something up in the heat of things; i.e., custom button subsets supersede any/all of the global menu settings when pressed. FYI: for colder temps, 66 North WindPro Touchscreen gloves are the only ones I found so far that work with the Smart controllers.
- Servo cases on the R3/R5: I stay on Servo Case #1 and my default is 1, 0, 0 for slow moving subjects. Note: faster acquisition also means faster to lose focus, so it requires more refocusing aka pumping. When blessed with playful cheetah cubs, I switch to 1, 0, 1 or 1, 1, 1 and 4 pt. surround as long as there's no foreground grass. For running cheetahs, leopards/cheetahs jumping up/down trees, or subjects that spook easily, I switch to 1, 2, 1 or 1, 2, 2. On the R1, I manually set it up the same way (vs. using Auto).
- I always use Single point AF w/Sensitivity set to +1 for faster acquisition, switch to Spot AF point when shooting through grass, and only use 4 pts. when needed; i.e., for romping cubs. Previously on the 1D bodies, I knew where to place my focus box fully cognizant of each camera's crosshair behavior (vertical/horizontal lines which looked for detail with the most contrast, even if outside of the actual box). As a result, I find the R3/R5 a bit more loosey-goosey as the camera wants to find an eye/face/torso (aka the bouncing blue boxes). Sans crosshairs and with only the vertical line, the cameras can easily lock onto a puma's ear or a leopard/cheetah spot if there's more contrast in front of the eye, etc. Aargh - my R3 even grabbed the buttholes of puma cubs that were wrestling around! The R5 hunts even more and that's the issue when you let the camera do too much of the heavy lifting. Maybe my expectations are too high because I want the instant lock on speed that I get with One Shot (which I still use on stationary/slow moving subjects because of baked in muscle memory from when everything was manual).
- The R1 now has the more accurate crosshairs again, and across the entire frame. OTOH, the camera is so fixated on what it finds (even before I press AF-On to start focus) - i.e., the 2nd/back subject when the front subject is looking to the side, the back eye if there's grass waving in front of the forward eye, and it often grabs a cheetah ear if two subjects are looking to the side and I'm waiting for them to look up/turn towards me and/or for the ears to point forwards - that it drives me a little nuts and I prefer the linear behavior of the R3 (i.e., wait for the moment, start focusing, and then start tracking if/when the subjects starts to move).
- I really do love my R1 even though it will try to focus on what it wants to focus on - even when I turn eye detect off, change to One Shot and/or or change my focus point to a locked version. As a result, it's impossible to focus halfway between two subjects when dealing with depth of field issues (which means I often have to stop down to f/13 or f/14 with multiple subjects). But, when the subject's face is clear and it's ready to rock and roll, the R1 sings to high heavens and grabs the correct eye WAY faster than I can move the smart controller. Note: my R1, purchased in Jan. 2025, has the reported heat display issue and the black display issue (deep sleep) which happened several times a day out on safari. Canon CPS now has my R1 but they say that they can't replicate the issue, so I'll be sending in my lens as well.
- I use My Menu a lot and register the settings that I need/want to change the most.
- My Multi-Controller is set for AF point direction (a press goes back to center) and my Set button is set to change ISO. I also limit my options to speed up on the fly changes; i.e., shooting modes. And, I always swap batteries when they go below 50% to maintain maximum fps.
Metering and White Balance
- I use EV +1/3 to +2/3 (or +1.5 to +2 in the Arctic) so that I expose all the way to the right. That's because one stop of underexposure - i.e., the right column in your histogram - is equivalent to throwing away 1/2 of the available pixels for editing. I then fix my exposure, tonality and mood in post processing which results in cleaner files. This way, my subjects are less muddy, especially when they're in shade. This is with Auto Light Optimizer set to off.
- If shooting subjects in trees with the sun behind them (aka in shade), I ignore highlight blinkies that come from areas that will be cropped out of the final image. I also add a gentle touch of fill flash with a bounce card whenever possible. I use Daylight white balance because it gives me more consistency for easier post processing.
ISO/Noise and Preserving Tonality
- I'm happiest with files when shot @ ISO 400 or below. Even though I shoot to the right to eliminate as much noise in the shadows as possible, my brain/eyes can still see noise in the files. Since I normally have to shoot @ ISO 1600 - 3200, minimizing noise takes some finesse in post-processing.
- Even if I can barely see my subject in very low light, I've learned to push my ISO because sometimes I'm rewarded with images like this Indian leopard - or these precious cheetah babies at 2.5 weeks old - even though it's a ton of work in post-processing to address color correction issues. Note: the R1 is amazing in very low light; i.e., even nailed focus on a cheetah mom and cub at 20k ISO, f/5.6 and at 1/125 aka unbelievable.
- High ISO noise beef: When I shoot with a shallow depth of field, foliage gets mushy or painterly aka distracting. If I shoot with more depth of field, dry grasses get crunchy when sharpened - i.e. halos. Plus, files look more muddy (green color cast from foliage) and using Clarity gets risky. As a result, I rarely sharpen in Lightroom, do a small luminous noise adjustment and leave color adjustment on default unless I shot at ISO 3200 or higher. After I import into Photoshop CC, I use a gentle dose of NoiseWare and then do import sharpening on the green channel. Then comes the tedious part: I never sharpen grass, foliage, the background or sky aka I mask them out hair by hair. Note: sharpening foliage makes reflections hotter (brighter) which distracts in my opinion. I also remove remaining color noise around the face/chest with a Hue/Sat adjustment layer as needed.
- When buying a new camera, I always test it and learn it thoroughly before going out on safari as every model has it's nuances; i.e., 1) some perform better at 1/3 stops vs whole stops (i.e., reportedly on the R1), 2) AF cross hairs vary and have a coverage range, and 3) custom functions are different, etc. Nothing is worse than leaving awesome photo ops on the table because settings weren't optimized, or having a camera that is plagued with error 99/80, focus or overheating issues.
To/From the Land Rover or Jeep:
- I carry my camera rigs in large dry sacks (size 55L because it's faster to whip cameras in/out, to fold them over several times in the rain, and to protect my day bag in rain when needed. The 55L also fits the 800mm/body/1.4x combo with the hood reversed.
- For basic dust protection, I use Outdoor Research's Ultralight Dry Sacks because they come in a neutral gray (doesn't spook animals) and only weigh 2.5-2.9 oz. I also bring 3 oz. REI/GuraGear backpack covers for faster cover ups when vehicles whiz by kicking up dust; and for clothing layers, I use a 2 oz. Outdoor Research 15L graphic sack. After each trip, I fill all sacks/covers with water in the tub to check for water/moisture seepage and replace them as needed.
- For rain protection in open vehicles, I use Outdoor Research's Durable Dry Sacks because they last the longest in terms of water/moisture seepage prevention; and, they have webbing on the side so that it's easy to anchor them to roll bars/seats with belt straps. They do, however, weigh 7 oz. each and take longer to dry in heavier rain (waterlogged albeit moisture doesn't get inside). As needed, I save weight with Outdoor Research's Ultralight DryPack Liners @ 3.0-3.6 oz.
- For my day bag, I had been using a ThinkTank's Glass Taxi which has an amazing capacity for a small, 2.5 lb. footprint. With a Test Drive bag attached, it hold a short lens, sunglasses, monocular, iPhone, HoodLoupe, sun hat/bandana, remote cables, map/compass, StormJacket rain covers, Zing neoprene pouches/straps, rocket blower/dust brush, Q tips, Fenix PD25/35 flashlight, Princeton headlamp, microfiber towel, fix-it tools, snacks, sunscreen, eyeglass/Deet wipes, tissue/Wet Ones, first aid, ginger chews, eye drops and gloves/hat/neck gator in winter months. I tried using cheapo lightweight backpacks but found that the Glass Taxi w/1 divider and organizer meshes is faster to organize and find things. The Glass Taxi also hides/protects gear - i.e., chargers, monohead, monocular, loupes, flashlights, flashes and spare CF readers, etc. - when checked in a soft sided duffel. When travel weight is more of an issue, I can get by with a 12 oz. REI Convertible Stuff Tote but in Feb. 2025, I reverted back to my ancient version of the PacSafe VentureSafe 25L (1.3 lb., not 1.7 lbs.) Since there's less protection from damage/theft in checked duffels, I stow chargers/valuable items in Eagle Creek padded/Rimowa cubes and layer dry bags/straps around them to keep sticky fingers at bay. This way, my travel camera bag - the ThinkTank Advantage XL roller remains clean for travel plus my day bag is pre-loaded. For Patagonia and Wat'chee, I use the PacSafe Venture Safe 25L along with an Osprey Ultralight 3.oz stuff sack with straps.
- Straps, straps and more straps (aka quick release buckle belts): my rigs are tucked inside dry sacks and then anchored to the seat with buckle straps. These straps keep gear from crashing to the ground during sudden stops and/or bumping against each other. Prior to anchoring down my gear, I struggled with holding cameras/lenses on my lap (without dinging them) and also had much more shoulders/neck strain. I bought my belts at strapworks when they use to have more variety. To buffer vibrations, I also use a small beanbag under each rig; and, I use Op/Tech Adaptor Loop connectors to anchor lenses to bodies.
- Triple rain protection: Having dry sacks and backpack covers on hand provide double protection when sitting in light rain or driving around in mud. For heavier downpours, I also use Pro Storm Jacket Telephoto covers.
- My comfy little strap secret: Typically, one holds onto to the roll bar for stability when drivers are speeding around like race car drivers. For height constrained folks, this means that your shoulders are hunched slightly forward and are not braced against the back of the seat. Instead, I prefer to hold onto a strap anchored to the roll bar/seat behind me. This way, my body and shoulders are planted to the seat and there's much less jarring when hitting potholes. And, when I loop my arm completely through the strap (modified with a 2nd short strap), I can lean forward and do 180 degree turns for more effective game spotting.
- I also strap a couple of pouches to the roll bar (Zing neoprene pouches for fast access to a monocular or Hoodman Loupe) and a ThinkTank Lens Drop In pouch (for glasses) in lieu of wearing overstuffed vests. In Tanzania when there's a seat in front, I sometimes use a 4 oz. Timbuk2 Hidden Messenger bag as a quasi seat pocket.
Evening Routine on Auto-Pilot
- Download Delkin Black CF Express 4.0/2.0 and Prograde Cobalt cards to a MacBook Air M2. Note: downloading Delkin Black 1.3TB/650GB 4.0 cards with a ProGrade 4 reader is 3x faster than before. The 5 oz. ProGrade 4 reader is such a workhorse (4.8TB so far and very rugged/solid) that I bought a spare even though I also have the 4 oz. Delkin 4 reader. Note: I only use thunderbolt 4 cables, not the stock cables.
- Verify that folder sizes (bytes) match up 100% before copying to portable drives. For drives, I use 4TB T7 Shield SSDs paired with OWC/Anker TB4 cables. Note: Cable speed makes a huge difference to me as every minute saved - from downloading and backing up - is more time for analyzing images and prepping for the next shoot.
- Do a quick image audit for sharpness and depth of field.
- Top off batteries to avoid having to charge from empty and having potential conflicts with generator/travel schedules.
- Format cards and re-set camera settings
- To learn more about field back up tactics and archival strategy, under Backing Up in the Trenches - My Workflow towards the bottom of this blog.
- Note: be aware that electrical currents from camp generators may not be as strong as when testing laptops/devices at home; meaning that: a) it may take longer to charge your batteries and laptops, b) too many devices can blow out circuits, and c) you may not be able to complete your nightly back-ups as quickly as planned. So, set priorities especially when two shooters are sharing a room. For example, I make sure that everything is backed up before doing any importing in Lightroom; and, I always top off camera batteries nightly as opposed to waiting until they're drained. Also, I always unplug everything as soon as I'm done; including, the surge protector. And, when there's an on/off switch, I remove Canon batteries from the charger before shutting off. That's because AC interruptions will trigger the calibration lights which is a royal pain in the neck.
- Remove dust from camera and lenses with a Giotto Q Ball Air blower, a small generic paint brush, and a Giotto Retractable Goat brush plus gray cloth for the lens front. Then, wipe everything down with a damp towel and towelettes to remove sunscreen. etc/. Note: In India and at some U.S. airports, Giotto's Large Rocket Air blower could get confiscated when going through checked bag security because of its shape. Smaller rocket blowers don't work in dusty environments, so the Q ball is a good option. My current tactic is to place the Q ball in a mesh bag (tip bent over) and put it right on top inside a checked duffel. Inside the bag is a friendly note that says: "This is just an air blower to clean the front of my lenses and inside my cameras on African safaris where there's a ton of dust. Please allow and thanks in advance". I started this tactic in 2011 and since then, TSA stopped opening my checked bags.
- I never change lenses unless moving between camps and carry the Visible Dust Mini Quasar 7x sensor loupe for sensor inspections as needed. I don't pack the loupe's original case (quite large) and instead use a small Hakuba CF card.
- Wipe off sunscreen/bug repellent: wipe bodies down with a damp microfiber towel and also clean screens with an eyeglass wipe and/or an awesome device/eyeglass cleaner like Whoosh.
- Verify that all straps and screws/bolts are still on tight. Do minor repairs as needed. If there's moisture or rain, store cameras with Zorb-It packs in a baggie (or use rice in a pinch). Note: Canon R3 eyecups are prone to tearing, so I always carry a back-up. Also, Hoodman loupes tend to break from the lanyard. As a result, I reinforce with a small plastic tie and threaded dental floss.
- Replenish supplies - Sunscreen/bug/handy wipes, etc. - and make adjustments to what's carried out to the vehicles; i.e., rain covers, straps, clothing - or not. I keep a simple checklist visible so that I don't forget important items; and, to help document my workflow for the next trip.
- Sleep - force myself to get into bed early as 11 - 12 hour days in the field can be draining. Also, promise myself to drink more water the next day.
- On the last eve, all the gear is wiped down with a damp towel and dry sacks are rinsed so that items are relatively clean upon return home. Empty bean bags, dirty straps, dust covers and pouches are consolidated into one dry sack. After returning home, everything is ceremoniously washed/cleaned.
Quick Audit of Images:
- My priority is to analyze what's working or not in terms of my technique; i.e., camera support tactics and sharpness, metering, depth of field decisions and camera settings. I emphasize the word "quick" because if not, 2 -3 hours will blow on by; and, it'd be way past a decent bedtime for getting up at 5:30 - 6A in the morning.
- I use Photo Mechanic 6 as my front end to Lightroom because Contact sheet (same as LR's Grid) and Previews (same as LR's Loupe) is wicked fast. The preview zooming size can be pre-set and then increased/decreased by simply hitting "z" and/or changed in increments with "option or z" plus the "+/-" keys. A double/single click gets you back:forth between Previews and the Contact sheet. And, it's easy to learn assuming that you understand a bit about Lightroom file behavior. Here's a intro tutorial and more in depth tutorial albeit there are many more now on the web.
- I use Photo Mechanic strictly for quick reviews before importing to Lightroom. The more integrated method is to re-named raw folders during Photo Mechanic's import step (known as Ingest) which are then dragged into Lightroom (on the dock) for importing. In Photo Mechanic, any captions, copyright info, keyboards or number/color ratings, if done, can be saved to .xmp files which are then stored in the raw folder. Sport shooters and journalists love PM because the input window is much larger and easier to access/see than in LR. If you set up colors and descriptions for numbers 6, 7 and 8 in PM to match LR, the color info will carry over during the LR import. Ditto for 1 - 5 ratings (in PM, you need to press "fn" plus the number). In Catalog, press "fn plus the up/down" arrows to scroll through pages. And unlike LR, Photo Mechanic will play your video files.
- If you make keyword corrections to files in LR (and your catalog setting is √'d to automatically write changes into .xmp), these changes - i.e., key words - will show up in PM as well (learn how to via the Dan Cox tutorial linked above).
- I don't cull images with Photo Mechanic or Lightroom in the field because I can't really analyze critical focus points/ sharpness; or, assess the sharpness of hairs in areas that are most important on a 13" laptop. Unless it's an obvious user error, I wait until I'm cozy with a large monitor before making culling decisions. If I tossed every unsharp image, I'd never know if it's a user error or a camera calibration problem that needs to be fixed.
- Plus, an eyeball is not an eyeball until it's viewed on a large monitor. The normal rule of thumb is that the 2nd or 3rd image in a burst will be the sharpest because releasing the shutter sometimes causes camera vibration. However, this doesn't always coincide with the best gesture or when a subject's eyes are the most open or when the pupils are pointing in the most ideal direction. And in my scorebook, it's all about the eyes.
Packing List: All But Clothing & Custom Tailored by Trip
- Dust/Rain/Snow/Salt Water/Bug Protection: Outdoor Research Ultralight dry sacks, Optec/LensCoat neoprene lens/body covers, Zing neoprene pouches, buckle straps, Storm Jackets for camera/lenses 1-2 sizes larger than recommended, ThinkTank/GuraGear/REI rain covers. SeaSummit/OR bug head nets and InsectShield clothing, and always a flyswatter
- Gear Cleaning: microfiber towels (various sizes), Q tips, Giotto retractable goat brush, a small paint brush, Giotto Q Ball Air blower*, RayVu/Formula MC Lens Cleaner, gray microfiber clothes, Whoosh device spray, alcohol packets, iKlear packets, Visible Dust 7x Mini Loupe, 30x jewelers' LED loupe and glass cleaning cloths. Note: The Q Ball replaced my larger Rocket blower after I was stopped by security in India. It's less intimidating when the nozzle is bent over and I place it on top of my duffel attached to an explanation note for TSA staff. Since I started this tactic, TSA hasn't opened my checked luggage.
- Travel Protection: ThinkTank Glass Taxi/Limo, SunCloud and clear plastic eyeglass cases, LensCoat neoprene Travel Coats, Giotto microfiber lens pouches, ThinkTank pouches (Flash, Test Drive and Lens Drop-in), Rimowa amenities cases (for Canon R3/R1R5 chargers, cables, SSD drives, readers), medium/large Zing neoprene pouches (protects RRS monopod head/leveler and Gitzo monopod for travel) and Fragile labels. If using a REI Stuff Travel Daypack instead of the Glass Taxi, then I protect chargers, etc. in an Eagle Creek padded cube.
- Shooting Tools: Camera straps (UP or BlackRapid w/QD or LockStar, SunwayFoto/Desmond clamps/plate), Op/Tech Uni connectors/Foto&Tech tethers, camera/lense plates (RRS/Kirk/4th Gen), spare batteries, CFx cards (Prograde Cobalt/Delkin Black), remote switches, spare eye cups, LensCoat covers, monocular (Leica Monovid/Zeiss 8 x 20) or bins (Leica 8x20 Compact Trinovids) and bean bags (SkimmerSack, custom 8 x 10" and Kinesis SafariSacks). So. Africa/Botswana = Gitzo GM-5561T monopod with All Terrain Foot, RRS monopod head, RRS leveling base, 600EX II flash, Demb reflector/diffuser or FlashBender II, CPE-2/4En battery pack w/Eneloop Pro AA batteries/charger. Tanzania = Skimmer Pod w/risers, RRS monohead/leveling base, Wimberly M-1s. Other tools: OR dry sacks, Hoodman loupe, map, pocket compass, long/short buckle straps, shoe strings and carabiners. Non safaris = tripod GT5541LS/GT3540/GT2540, Wimberly WH-200, Mongoose 3.6 w/L plate or Flexshooter Pro/Uniqball 45XC plus OpTech Uni loop connecters/Kinesis tripod strap. Patagonia = Promediagear monopod, HM1 tilthead or Tomahawk GT2 gimbal and Black Diamond Carbon FLZ walking sticks. Spares: Gitzo foot, Gitzo screw cover, lens/body caps, flash shoe covers. Optional: Cotton Carrier, WalkStool, Wimberley M-4 macro arm (quasi panning lever) and Leica 14100 or Bogen tabletop tripod w/Giotto MH1302 ballhead/clamp.
- Image Back-up Tools: MacBookAir M2 w/spare MagSafe cable, 3-4 CFe readers (ProGrade/Delkin 4.0/2.0), SSD drives (4-5 4TB Samsung T7 Shields and several TB3/TB4/Fast USB C cables.
- Packing Aids: Packing/organizing cubes (Eagle Creek Specter cubes/sacs and eBags Ultralight) labeled with yellow electrical tape, colored see-through mesh zip pouches, Kokuyo pencil cases, reusable folding shopping bags and old dry sacks (in lieu of plastic ziplocks/trash bags) and semi-rigid Crystal Light canisters (protects SPF/toothpaste, etc).
- Fix it Tools: Fenix PD25s and E05 flashlights, 2 headlamps (Black Diamond/Fenix), pointed tweezers, Squirt S4 Leatherman w/scissors, Sears Craftman 4 way keyring screwdriver, white eraser, small channel pliers, Canon 2.0mm and 2.5mm screwdrivers (Japanese blades), the correct L wrenches, a General multi screwdriver pen, spare RRS/4th Gen/Gitzo screws and bolts, ties/rubber bands, zipper wax, single use loctite/gum drop semi-permanent glue, single use crazy glue, rubber jar remover, alcohol packets, egrips, and pre-cut reflective Kelty cord.
- Godsend Tape: mini roll of yellow electrical, pre-cut duct/gaffers/electrical tape strips spread out in various bags, mini scotch tape, Nathan's neon tape, cloth tape for finger scrapes and Tenacious tape patches (to repair beanbag seams).
- Electrical Tools: EuroSurge 1,200 joule surge protector, Monster Outlets to Go 3/4 plug power strip and 3 sets of Int'l plug adapters.
- Charging Tools: Anker 727/615 GanPrime charging hubs, 747/735 GanPrime charging bricks, and fast cables (Thunderbolt 3/4, C:C gen 2, Apple Watch Fast, etc. plus spares. iPad Pro; iPhone 16 Pro Max, iKlear packets, Swoosh cleaner/microfiber cloths, Ravpower/Belkin portable batteries, Ultimate Ear SuperFi 5/10 buds (w/Filo cable, Comfy tips, angled jack), and 2 euro headset jacks.
- Note: all things new or altered - i.e., every cable, cord, hub, portable drive, flash drive, screws, caps/covers, adapters, batteries, chargers, memory cards, readers and plates, etc. - are tested in advance (used and connected as if in the field) to avoid Murphy's Law.
- Misc. Batteries: AA (Canon flash/power packs) plus tester, AAA (clock), CR2025 (Visible Dust), CR2032 (head lamps/AirTags), CR123 (Fenix flashlight) and LR41 (keychain lights).
- Security and Speed Aids: 2 PacSafe TSA luggage straps, TSA luggage locks (plus 2 spares), Nite Ize dual carabiners (size #1/MicroLock), carabiners, REI calf wallets, luggage tags plus spares, retractable TSA extender lock, large/small luggage ties, zipper pulls (Eagle Creek, zipquix, Nite Ize), Streamlight nano keychain lights on lanyards/wrist straps, RFID passport sleeves, plastic organizer sleeves in various sizes, mesh pouches in various sizes, and dry bags to hide valuables in checked luggage.
- Personal: Vaccine card/masks/tests, Apple Watch, Biobands (motion sickness), travel clock, mini temperature gauge, nail clippers, keychain flashlights (in every bag, on lanyards), scissors to cut ties/tags and keychain thermometer; eyeglass cases (plastic/Chum's cases), ThinkTank Lens Drop/neoprene pouch for roll bars, cleaning packets and microfiber cloths); folding tote/bags; writing/tips: small moleskin notebooks, colored index cards, mini sticky pad, tip planners and envelops, mini metric and money charts, Sharpies, silver labeling pen and name/address labels, rubber bands and paper clips; cleaning: laundry sheets, Dryall spot pen, Shout singles, mini sewing kit, velcro, rubber drain stopper and Mephisto shoe brush; bug/germ fighters: sanitizers/packets, Ben's deet spray/packets, BugBand towelettes, non-deet spray, SeaSummit head net, Original Bug Shirt/net pants, fly swatter, shower flip flops, StingStop, emergency OTC and prescription meds, alcohol packets, peroxide, slant/pointed tweezers, topical staph antibiotic, Nalgene cups, rubber gloves, mini pill cases; snacks: Starbucks singles/KleanKanteen, BlenderBottle with protein/matcha/8 Greens singles, nuts and ginger chews; dust/grime/harsh water fighters: extra shampoo/conditioner, facial cleansing towels, toners, extra eye drops, nail brush, microfiber hair towel/travel hair dryer; sun protection: mineral sunscreen w/ zinc/titanium oxide (Supergroup, Elta MD and SunForgettable), Heliocare supplements, wide sun hats, sun gloves and bandanas. Lastly: disposable toothbrushes, single packet floss, Afrin/Sudafed and ShowerPills for travel days; and, kleenex packs, daily meds, eyeglasses/wipes, vitamins, sundries and cosmetics.
- Note: all packets are tested to insure that they're not dried out; and, all meds and personal products are replaced before expiration dates.
- Sub-Zero Temps: rubber bumpers for shutter buttons, Q tips and lens brush to remove snow, D rings sewn onto parkas and carabiners for hanging mitts, a generic tool to open battery/card compartments, hand warmer pouch sewed into a fleece cap to keep camera batteries warm, spare neoprene lens/camera covers (in case something drops in snow or blows away in gale winds), boxes of Super Hot Hand warmers plus insoles, extra fleece hoodies to double up as needed, a carabiner watch, and a dry sack tucked inside a L611 Kinesis Long Lens case. TBD: a squeegee for removing frost/ice from viewfinders (something better than Q-tips).
- Other Shooting Tools as needed: wide/macro lenses, lighting reflectors, 4th Generation Safari Companion, B+W XS-Pro Clear with Multi-Resistant Nano Coating 007M filters (repels dust/water spots), polarizer/Lee filters, Kneelons, OR rain/crocodile gaiters, Neos River Trekker hip waders or Adventure Overshoes, YakTrax Pro, Original Bug Shirt/bug pants, kneelons, walking stool and Black Diamond carbon FLZ trekking poles.
Tips for working on an Apple laptop:
- Make friends with Apple keyboard shortcuts; especially, the fn + up/down arrow keys for scrolling pages (see more here).
- To zoom your screen in and out: 1) press Option/Command + 8, 2) Option/Command + =/- keys (as set up in System Preferences/Accessibility), 3) or pinch the trackpad out/in using 2 fingers. Note: if you're using a Mighty Mouse, then go to systems preferences and set up Smart zoom which allows you to double-tap on the mouse with one finger.
- Command + up/down arrows moves up or down one visible section at a time; whereas, fn + right/left arrows takes you to Home (top of the page) or the bottom of a page.
- A nice Facebook shortcut is to use the J and K keys to scroll up or down quickly. You can also use spacebar and shift/spacebar, or Fn plus the up/down arrows on Macs. With desktops, I prefer using Page Up/Down on an extended keyboard.
- Handy Lightoom keyboard shortcuts include: shift-tab to hide all panels versus f5, f6 and f7 one at a time, the f key to get to full screen, the l key for lights out, option/command + 1 takes you to Library mode, the d key takes you to develop mode, the g key gets you to grid mode, and the e key gets you back to loupe view, etc.
- Lightroom/Photoshop Stuck Window Tip: If you accidentally drag the menu bar too far to the top-left, it disappears and the window gets stuck. To get it back, go to System preferences/Displays, √ the Scaled box and temporarily change the resolution (i.e., 1280 x 800) so that you can drag the menu bar again. If this happens to a 2nd monitor back and the tip doesn't work, then use Displays/Arrangement to move the window.
- In Safari, to go back or forward a page, use command + [ or ] keys (or command + right/left arrows); and, the spacebar for scrolling down and shift/spacebar for scrolling up.
- In Photo Mechanic, hide the Toolbar via View > Hide toolbar. Also remember to purge your Disk and Memory cache under Preferences. Toggle from the Contact Sheet (same as Grid in LR) to Preview Mode (same as Loupe in LR) by clicking the trackpad. Hide/regain panels with the f key and if needed, press r to get panels back. Press z to see your pre-set zoom size and increase/decrease the size with z (or option) + =/- keys. Or, zoom within a thumbnail on the contact sheet by setting View > Cursor Mode > Loupe and then hitting the spacebar (or clicking) while on a thumbnail. Command + k opens the keyword window. Tag and remove tags on previews with t (or command plus +/- keys) and select all tags with command + t. Command + m renames a file, and the rest is similar to Apple's shortcut (command + a equals select all, command+ i equals info, etc.
- Note: never laptop batteries drain below 20% when not plugged in as it might have trouble waking up.
The Count Down (6 Months Before):
- Insure that I have enough blank pages in my passport (and the required number of years remaining).
The Count Down (1-2 Months Before):
- Make sure that vaccinations are current and obtain any required entry visas.
- Make sure that camera and travel insurance are current.
- Ramp up strength building exercises to avoid injuries. Rest up and eat healthy to build up the immune system.
- Make a trip folder with easy access to air/hotel reservations, visas, and trip insurance policy #s and terms, relevant reference info and local contact numbers.
- Update my Master Pack and Prep Lists and Gear/SN list.
- Make sure that camera bodies and lenses have been serviced as needed. If serviced, re-check all settings as they're often changed.
- Order fresh batteries, SSD drives and CF Express cards as needed; and make sure that they are registered.
- Update all firmware - computers, cameras, lenses, memory cards and card readers, etc.
- Verify flights/connections and that airlines have my TSA Pre-√ number on the reservations.
- Purchase any sundries, medications or photo tools that need replenishing. Check all expiration dates as now is not the time that I want OTC meds, antibiotics, sanitizers, sunblock, bandaids and eyeglass wipes, etc. to perform at sub-par levels.
- Look for more ways to downsize weight ounce by ounce, more ways to increase workflow efficiency/speed while minimizing gotchas, and more ways to reduce using plastics.
- Start setting aside crisp/unmarked $1's, $5's and $10's for tips in countries where U.S. currency is accepted.
- Start cleaning up desktop/laptop computers to make space for new image folders and trip edits.
- Clear browser caches and delete all unwanted cookies aka 95% of them. If browsers are running slow, reset them as well.
- Update all software and verify that preferences and settings are correct.
- Run Disk Utility's First Aid and do repairs as needed.
- Maximize laptop space by clearing all images and LR libraries not related to the upcoming trip. Worse case, delete 1:1 previews.
- Finalize all decisions on hardware/software upgrades and photography gear. Test every new purchase for reliability and compatibility; and, add name labels.
- Make the time to read manuals and thoroughly learn new cameras and software, etc.
Creative Goals and Depth of Field:
- Make clear, specific goals for every trip aka be on a mission. Define and prioritize who and what you want to photograph. This helps in making difficult lens choices; i.e., the high priorities vs. the nice to have (seen a zillion times).
- Review depth of field charts - by camera, focal length, f-stop and shooting distance - and do a mental dry run. My belief is that everyone needs to build their own DOF cheat sheet because style is very personal and the process helps you to memorize tradeoffs i.e., stopping down might only gain a few inches. And, the same lens on a cropped body gives you less depth of field than on a full frame at the same distance.
- This prep step warms up the thinking cap - getting one to think about what worked and didn't work on previous trips. It makes me go back and analyze exposure settings on favorite images and what went wrong on sub-par images aka learn from my mistakes. This helps me to define what I want to do differently on the next trip.
- Which body on which lens can make a difference in end results, so yet another thing to think though. As someone who doesn't like to switch lenses on game drives because of dust, I try to plan out my strategy beforehand. Stop down - or not? Many newbies are told to stop way down when using a super-telephoto lens at near minimum distance. But in my view, the depth of field gain is minimal while the shutter speed can be risky. For example, on a 1.3x body and 500mm at 10 yards, the gain per stop is only one inch. For me, a narrow depth of field makes the eyes pop and allows for a faster shutter speed without having to crank up the ISO. Also, bokeh can get more distracting when you stop down. Since no two scenarios are ever the same, I try to shoot at different f-stops whenever possible.
- Group shots: It's difficult to capture a grouping of large adult subjects when using super-telephoto lenses as the physics of getting all heads sharp is not in our favor unless subjects are all on the same plane. So, focus on isolations or just enjoy the moment. With smaller subjects like lion/cheetah cubs, F/13 is a safe bet as long as your camera can handle the higher ISO.
- Timing, timing, timing: When watching wildlife documentaries, movies or videos, mentally practice shutter release timing and adjusting camera settings so that everything is on auto-pilot. In fact, you can learn a lot from most any movie that you watch in terms of lighting, framing, focal points, depth of field, color, tonality, style and mood.
- A cheetah will reach top speeds - 65 mph - in only 3 seconds. If you're after that shot, make sure that you've memorized your "best case" camera settings and are ready for timing the shot at the right moment without hitting the buffer.
The Full-Court Press (7 Days Before Departure):
- Re-check all camera custom function settings.
- Check for last minute firmware and software updates.
- Top off camera batteries and calibrate as indicated.
- Format all CF Express cards and SSD drives.
- Clean lenses, drop down filters and camera sensors as needed.
- Reinsert flashlight/clocks/headlamps, etc. batteries and pack spares. Verify all battery levels beforehand.
- Hide AirTags in all travel bags (change batteries once a year).
- Test screws and pack all fix-it tools. Note: review my Check Your Screws and Words of Wisdoms post because I'm always seeing folks with loose lens feet or tripod/gimbal screws which is a sure way to wreck your gear/images.
- Pack 3 sets of international plug adapters (2 sets in carry on and one in checked).
- Top off iPhone/iPad/laptop/portable batteries and never leave in chargers for over 24 hours.
- Download Amazon Prime/Netflix/YouTube videos to the iPhone 16 Pro Max/iPad Pro 13" for watching offline.
- Figure out tips and cash requirements and get crisp/unmarked bills in the denominations needed from the bank. Separate tips from emergency travel cash and pack in color coded mesh pouches.
- Figure out how much to convert to foreign currency upon arrival and in what bill denominations. Note: hotels have minimal bill denominations on weekends and it's worse if arriving on a Sunday. Pack more than one ATM card to avoid gotchas when networks don't work or when a card doesn't participate on the ATM's network. Also print wallet size currency converter charts.
- Review airport layouts for lounges and ATM locations, etc.
- Update my CJ Lists folder which includes all travel references (word docs/pdfs); i.e., air/hotel reservations #'s, ICE info, travel insurance, hardware/software serial numbers, purchase receipts/value, camera custom function settings, depth of field charts, manuals, troubleshooting cheat sheets, meds/prescriptions #'s/history, credit card customer service #'s (plus bank customer service #'s for countries visited), local contact #'s and gear/clothing inventory, etc.
- Verify that my Documents folder, Music, apps, Contacts, bookmarks and travel related desktop folders are all up to date before copying from my desktop to the iPhone/iPad/SSD drive/MacBook Air.
- Copy relevant lists, air/hotel reservations and travel insurance info to my Contacts, Notes and GoodReader for easy access as well.
- Note: Apple's Contacts is a very powerful tool and I use it to store any/all information into a central repository - i.e., I "cut" useful info from hardware/software technical help and support forums, my emails, airline/hotel references, travel insurance policy, personal word/pdf docs, photo/computer troubleshooting tips, and keyboard shortcuts, etc. - and "paste" into a new or existing contact. Net:net: any information that I might need for travel or troubleshooting is at my disposal on my iPhone/iPad/laptop without having to access the internet. I learned my lesson the hard way when my Macbook Pro displayed the kiss of death (LCD went black) after a major power surge tripped it at a safari camp. I tried all of the normal fix-it steps from memory but forgot to do the infamous PRAM because my Apple troubleshooting notes were sitting on the computer. Even if I did have access to the internet, it would've taken me longer to research answers then to browse my own troubleshooting list. In the field, it's important to be self sufficient because travel buddies typically have their own issues to deal with and may not be helpful as expected. An easy way to start building your own troubleshooting cheat sheet - by product/software - is to cut/paste from forum suggestions, vendor FAQ's, how to articles/blogs and vendor databases/emails to Contacts every time you read something useful.
- Make hard copies of my passport/VISA, medical prescriptions and travel/credit cards (with DOB and expiration dates blackened out). Note: if you haven't done so already and travel abroad more than once a year, register with the U.S. Customs Global Entry program which allows you to skip the long customs lines at your port of entry. The program costs $120 (good for 5 years and many credit cards reimburse this charge) and renewing is simple. Global Entry members can get a Nexus card for $15 which allows you to go through Nexus lines (aka faster) at major airports in Canada/Mexico. At most major airports, Global Entry members automatically quality for the TSA Pre-√ program, so add your Trusted Travelers # to airline profiles and verify that this number has been added to your reservations as well. I also use CLEAR at major US airports.
- Limit the number credit cards and provide respective companies with travel dates and the countries to be visited. I use separate credit cards for travel/overseas (only those w/o transaction fees). Note: make charges in the local currency or else the merchant might charge an extra transaction fee.
- Verify that debit cards work in the countries to be visited, and that pin numbers are valid.
- Order the T Mobile Int'l data plan. As before, you still need to check for countries that qualify and whether you'll have cell service reception. Note: Reset data usage on your iPhone as soon as you land abroad in order to track usage.
- Verify that Yahoo Mail is working via cellular. Since IOS 11, IOS Yahoo Mail tends to break more often, especially after IOS updates. Some fixes, like resetting the network and/or removing/re-installing Yahoo Mail works most of the time, as well as using the Yahoo app. This site has another nice solution as well and they walk you through the steps.
- Pack clothes, sundries, medications, vitamins, travel folder, personal items, photo/computer gear, snacks, and spares of anything critical to travel comfort and shooting success.
- Spray clothes/shoes with permithrin (good for 30 days) and waterproof items as needed.
- Verify that every item has a label or ID.
- Pre-pack field supplies for my day kit and make a "grab list" to make getting ready for the first game drive quick and efficient. That's because when items are spread between bags and hidden in pouches, it's easy to forget things (out of sight, out of mind) especially when jet-lagged or sleep deprived.
- If checking a small 2nd duffel, distribute clothes and camera support items in case one bag is late or missing in action.
- Review/update my Master pack list and weigh all bags.
- Then, the real fun (aka serious stress) begins; i.e., deciding what's a must have and pulling out the nice to haves - i.e., snacks, emergency supplies and new tools to try out, etc. - aka the never ending struggle to reduce weight - ounce by ounce.
- Start a new trip notebook (I use Moleskine) - include reservation #'s, passport info, emergency contacts, important actions items and a mini currency conversion chart - which I keep handy in a cargo pocket for jotting down trip notes.
- Review international airport arrival and departure terminals/gates so that it's easy to assess the amount of time needed to get from point A to point B; i.e., at Frankfurt, it can take 45 minutes to get from Terminal B to C (and vice versa) with security checks after de-boarding and pre-boarding. My goal is to be at the gate at least 30 minutes before check-in; and, longer in places where they do security checks at the gate as well. I try to have at least a 3 hour layover when heading to a destination.
- After all last minute items are packed, tuck air itineraries into each bag, lock with TSA locks/plastic ties, add AirTags, and take photos of camera/travel bags.
The Evening Before (or Morning of Departure):
- Print boarding passes if possible.
- Update Address Books, bookmarks, Goodreader and laptop folders as needed.
- On Apple devices, close open apps, turn off notifications, location services and Wi-Fi (improves battery life and security).
- On the laptop, verify that wifi/file sharing are off and that NordVPN and Apple firewall are on.
- Finally, it's game over and time to rock and roll.
- Upon arrival at the first international destination (i.e., a layover), turn off data roaming and turn on Airplane mode to stop cellular towers from pinging the phone which drains batteries.
Back in the Saddle Again:
- First things first - catch up on zzzz's. The more I sleep on Day One (aka my lights out marathon, a minimum of 14 hours), the faster it is to adjust to the 10 - 12 hour time zone difference.
- Next priority = back up all images 2x (and 2x at a 2nd location as well).
- Document travel related notes while they are still top of mind - what worked and what didn't, etc.
- Inventory travel tools/sundries, clean gear and re-order/replenish must haves. If not, action items tend to get dragged out.
- Catch up with family and friends - aka show appreciation to those who tolerate and support our photography obsession.
- Send cameras in to Canon CPS repair for cleaning and AF points calibration.
- Now, the creative mind is clear to focus on images.
Lightroom Library and Image Archival:
- Several friends asked me how I manage libraries - one per trip, one per year or everything in the kitchen sink.
- I prefer to create a new Lightroom library catalogue for each trip and keep it together with the trips's raw folder initially on my travel laptop, then on the desktop while editing images, and then archived with raw/edit folders on external archival drives (Toshiba 16/18TB eSATA drives stored in daisy chained OWC Thunderbolt ThunderBay 4 bays as JBOD, not RAID). Note: archival drives are copied over to new drives every 3-5 years as failure protection; and, older drives are stored in plastic drive cases stacked inside plastic bins.
- I feel that there's less risk of corruption when smaller catalogues are upgraded to newer versions of LR and operating systems. Also, it's less of a hassle to find missing links when moving catalogues between drives.
- After editing out the losers, I make a collection of my "best ofs" from the trip. This best of collection could be 200 - 500 strong, and I work off of standard or 1:1 previews.
- As much as I like to get things done and move on, I never rush this process. I'll look at images on the flight/s home to get a sense of my favorites by doing a quick & dirty collection. But, the real ranking and decision making is after everything is unpacked and put away, after I'm caught up on emails and other tasks, and I'm in a rested state.
- In addition to tagging the Best of's, I develop the story that I want to tell which helps me to get to the short list.
- My goal is to develop the best portfolio out there on my favorite subjects, and to have a consistent style that is unique to me.
- Next, I start making sub-collections. At this stage, I work off of 1:1 previews to increase the speed of analyzing images. I also crop and address white balance to insure that grouped images hang together properly.
- I routinely select all (Command + A on the Mac) and save metadata (Command +S) to the files along the way even though I already set my preferences to do so. And, I back up my LR catalog each night.
- With sub-collections, I can easily duplicate a WIP gallery and change the order of images to see which body of work is stronger. If I need to fill in a storyboard, I just grab the appropriate image out of the master "best of" collection.
Lightroom Adjustments:
- Unlike most, I use Lightroom to prep images for editing in Photoshop as opposed to using Lightroom for eliminating work in Photoshop. That's because I still feel that Photoshop does a better job with tonal correction; i.e., it allows me to be more precise when using channels/masking (important for preserving tonal gradation and wrap around light). And, using layers saves a lot of time when images need to be tweaked.
- I start by purify colors using the white balance dropper and then warm things up just a tad.
- Next, I adjust exposure, highlights, shadow and white sliders. My preference is to use tonality to separate subjects from the background as opposed to color balance aka it's more natural.
- Then, I do a gentle dose of clarity (< 5) to add mid-tone contrast and dehaze, followed by a gentle tone curve (+5 lights -5 darks as a starting point) and a contrast adjustment as needed.
- Then, I fine-tune black, white and shadow sliders. Note: clarity darkens the shadows in addition to mid-tones. As a result, images tend to be more muddy and require more attention than before.
- If I still have problems with hot spots, I adjust the highlight slider in curves.
- I don't mess with colors except for a little vibrance ('tween 7-10) and saturation (-/+ 5).
- Then, I stand down and evaluate.
- Before I export into Photoshop, I turn off sharpening and bump up luminous noise 2 - 6 for images shot between ISO 400 and 6,400. That's because I prefer doing selective input sharpening in Photoshop after doing a NoiseWare layer (more precise using masks). Note: on extremely noisy images, I also test LR's Denoise new feature.
- Once I have the look that I want, I insure that all images in a given gallery have similar treatment for consistency.
Photoshop CC Approach:
- My editing technique is old school - using Channels in Photoshop - to preserve as much 3 dimensional tonality from nice glass and the original file as possible. That's because whenever I evaluate 3rd party plugins/filters, edited files may look sharp/vibrant at first glance; but, they often have a 2 dimensional look - aka they look flat or cookie cutter-like - IMHO.
- Basically, I use the creative seeing approach that Katrin Eismann taught us many moons ago and it's how my brain sees, analyzes and fixes only what's important. This means optimizing the main focus and de-optimizing un-important areas along with other distractions. I aim for a clean, natural, 3 dimensional and consistent look.
- 90% of my time goes to making a precise input sharpening mask (green channel) which I modify/re-use for output sharpening as well. I also re-use the mask for curves and color adjustment layers when needed, again on a given channel. Masking out unimportant areas using channel on a curve layer takes time too; but, the end results make a difference in my belief.
- The only plug-in that I use is Noiseware. I bought all of the Nik filters but never embraced them. With highly touted plug-ins like MacPhun and Topaz, I always test them to make sure that I'm not leaving something on the table.
- Editing for large prints take a lot more time because every little distraction shows up big time.
- Before I get too far along on a project, I always evaluate images on different monitors and laptops - including, some that aren't calibrated aka the real world - which saves time in the long run. You'd be surprised with monitor variances with regards to warmth, color casts, white points and shadows (can look muddy). In addition, I try not over-sharpening because to me, it's distracting.
Focus on the So-What's:
- Editing tools evolve and change but your vision and execution is what really matters.
- It's important to think through what you are trying to communicate and how you're going to grab the viewer's attention and heart before touching any sliders or palettes.
- Before starting to edit, articulate what needs to be done and why? This is the Katrin mantra that was drilled into my head when I first started. For example, not every image needs to be sharpened (especially globally); and, it's important to watch for sharpening artifacts along dark/light edges, whiskers and leaves, etc. I strive to avoid that crunchy look that you normally get with plug-ins and off the shelf actions. Note: if you want to emphasize something, consider de-emphasizing the inverse; i.e., desaturating, toning down or blurring the background. Also, I avoid over-saturating or doing color balance adjustments on just the subject/s which looks unnatural to me.
- What rules for me is maximizing tonality. That's what maintains that three dimensional look and why I use channels to accomplish this goal. Using plug-ins/filters may be faster, but masking areas with a hard/soft brush - @10 - 100% opacity - doesn't preserve the way light wraps/falls off a subject. Just saying. Studying black and white classics helps with developing tonality seeing abilities; i.e., I always refer to my Arnold Newman books because his compositions always tell a mesmerizing story.
- There are many ways to tackle objectives - the 30 second, 3 minute, 30 minute or 3 hour approach (again ala Katrin) - and each approach has it's plus and minuses. So, pick your battles and invest your time where it really counts. For me, my effort is focused on making a good sharpening mask and getting rid of color cast/noise without ruining the mood of the lighting or flattening out wrap around light that I worked so hard to achieve while shooting. I also tone down distracting specular highlights (because the eye is drawn to light tones).
- If you learn things the hard way first, you'll be able to judge the effectiveness of easier methods (i.e., advancements in raw converters and plugs-in); and, you'll end up with more consistency in your work. That's why, I like to understand what's underneath the engine - exactly what the Photoshop tools and Lightroom sliders are doing (the so-what's) - so that I can minimize overlapping, conflicting and negating effects.
- Sharpening: only sharpen what's important. Also, make sure that your eyeglasses, if needed, are dead-on accurate. I can't comment on sharpening plug-ins because I never use them.
- I find it invaluable to take my time when working with new versions of Lightroom and Photoshop as often, the slider algorithms can change dramatically.
- The following folks are excellent at explaining what's important and how to tackle different objectives:
- If you want to learn/understand what's happening underneath the engine while performing Lightroom/Photoshop tasks - while avoiding the pitfalls like crunchy edges, halos and garish colors - then Tim Grey at timgreyphoto is the go-to guy.
- If you want to better understand retouching, masking, channels and creative seeing, pick up some Katrin Eismann books.
- If you want to improve tonality skills - seeing, optimizing and printing fine art ala Ansel Adams - then sign up for a Charlie Cramer workshop. Charlie studied under Ansel and teaches at the Ansel Gallery workshop in Yosemite.
- You can also learn all about lighting from Bruce Dorn, a Canon Explorer of Light. Everything he does has timeless beauty and he helps you to think outside of the box.
- Note: none of these skills are learned overnight, or even in a year. Mastering these skills is a multi-year commitment and is no different than achieving excellence in your professional field or with other hobbies.
Don't Rush but Don't Get Backlogged
- Don't blast through selecting and editing images, only to conclude "what was I thinking?" down the road. You'll find yourself re-doing edits over and over because your brain knows when something is amiss. OTOH, don't get backlogged and leave images sitting trip after trip. That's because some of the emotion and reasons that you took the images in the first place get lost over time. In addition, it'll feel more like work as opposed to fun the longer you procrastinate. Been there, done that.
- Lastly, editing tools improve over time. I'm not into easier/faster AI enhancing tools yet (tend to loose tonality), but have been dabbling with Lightroom's Denoise on extremely underexposed backlit images like this one taken at dusk in 2007 with a 1Ds II/500mm v.1.
Safe travels,
Chris